
Create free account ↗
DRONECOLLAB · TECHNOGIS

Create your DroneCollab account

From registration to your first cloud mapping workspace, in six illustrated screens.

Get to know the drone mapping platform before setting up your cloud mapping workspace with the registration steps below.

DroneCollab map workspace after account registration
DroneCollab · My First Project
1Enter your account details
2Verify your email
3Select a package
4Set your account password
5Wait for workspace preparation

Create your DroneCollab account

Click screenshots to enlarge

1
Account details

Enter your account details

Open the DroneCollab registration page. Enter your full name, email address and phone number with the correct country code.

Accept the Terms of Service and Privacy Policy, then click Send verification code.
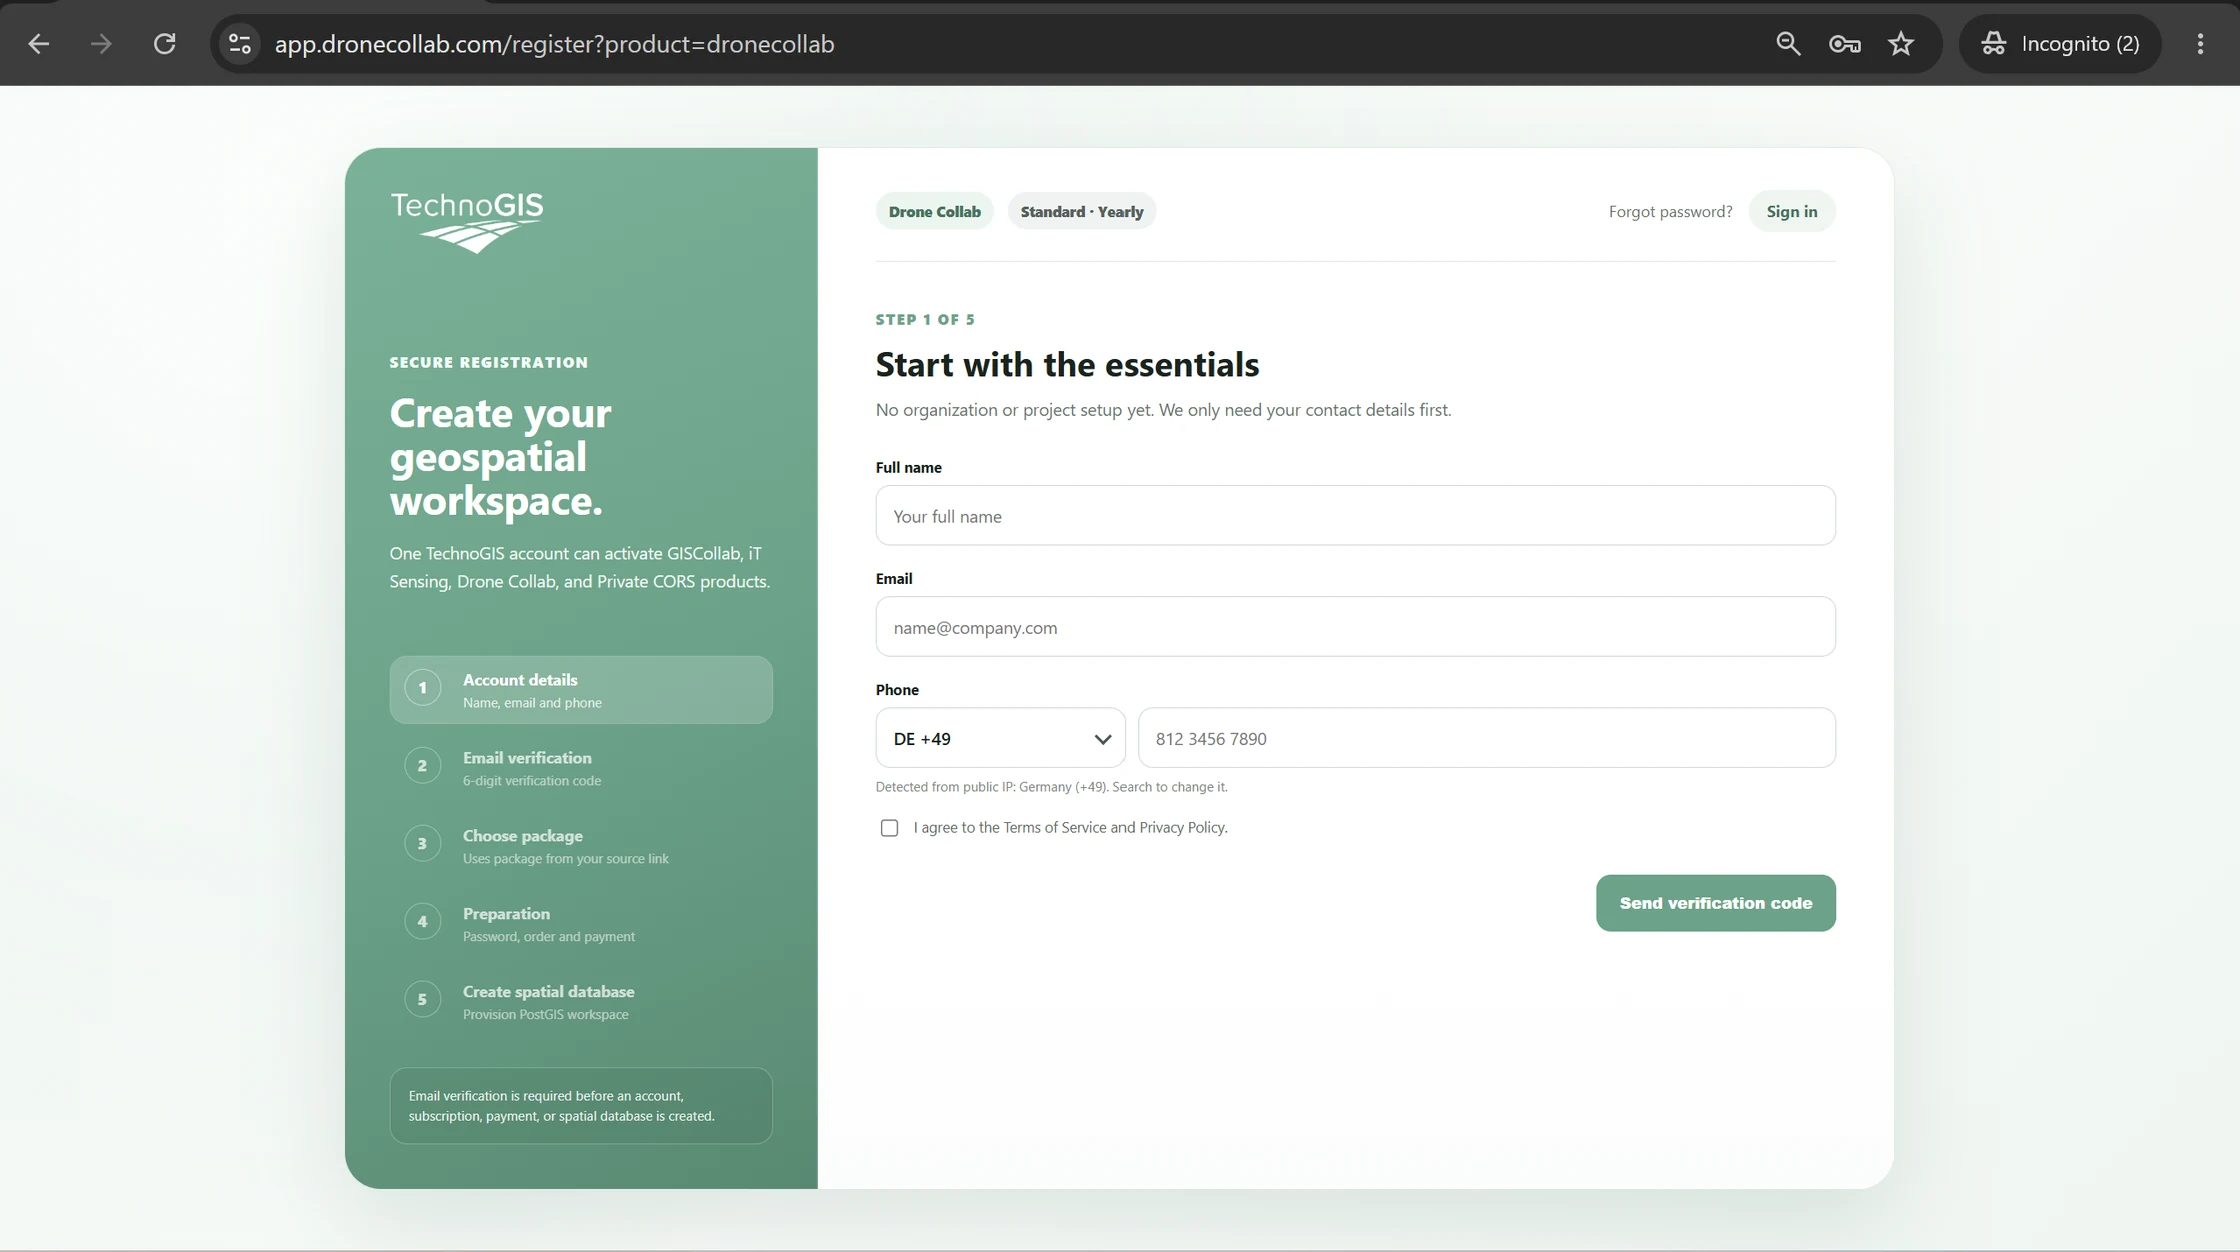
DroneCollab registration form for entering new account details
DroneCollab · Account details
2
Email verification

Verify your email

Open the message delivered to your email inbox and find the six-digit verification code.

Enter the code and click Verify email. If it has expired, use Resend code.
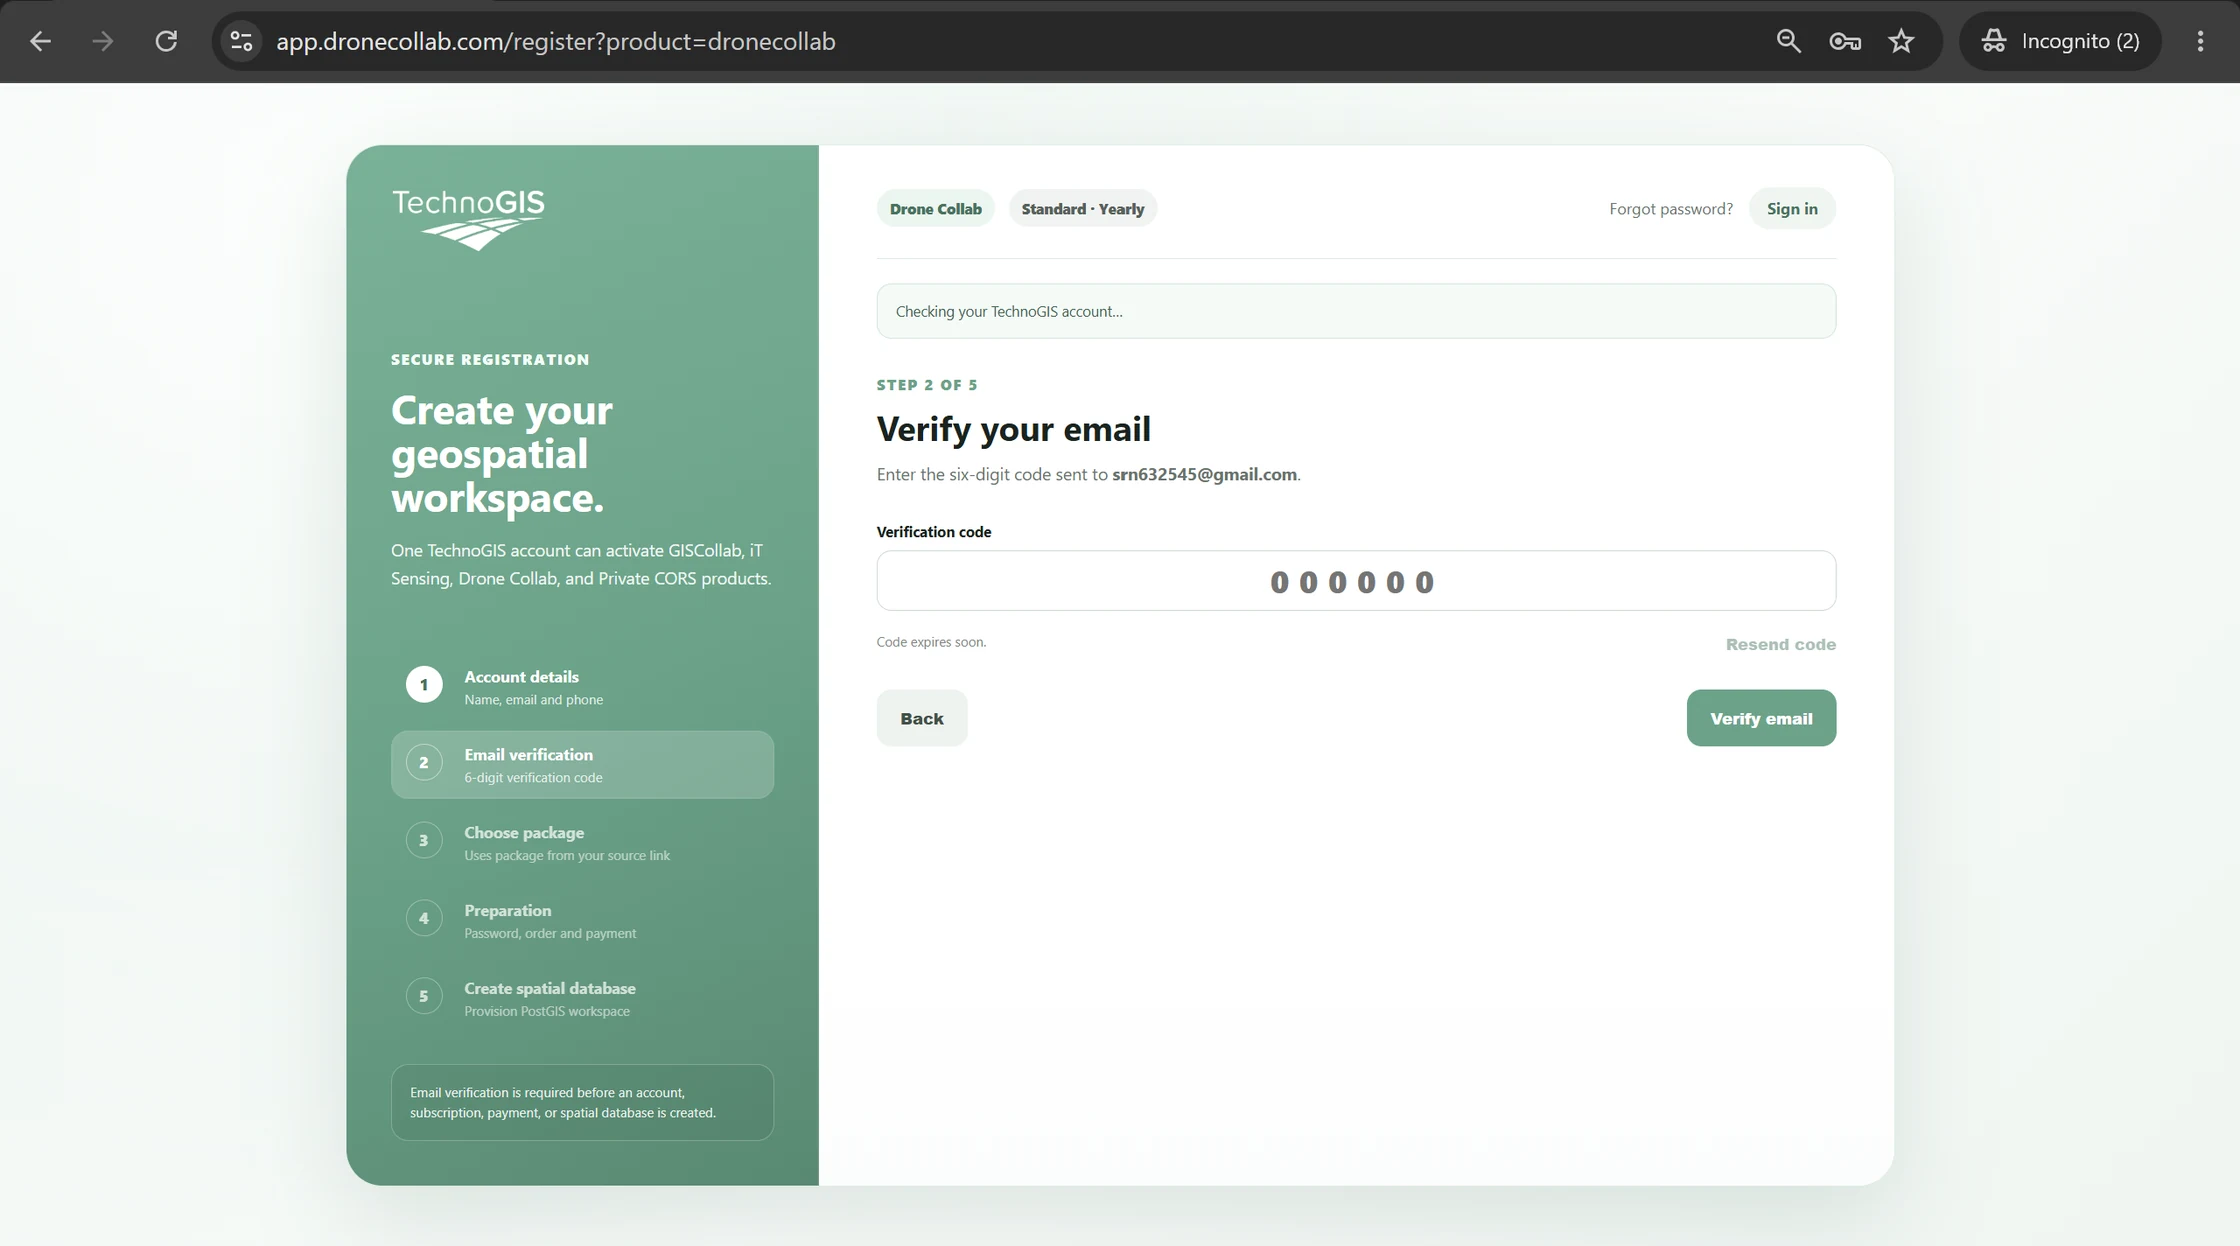
Email verification step for a new DroneCollab account
DroneCollab · Email verification
3
Choose package

Select a package

Review the available packages and choose a monthly or yearly billing mode if needed. The screenshot shows Free and paid plans.

For a free start, choose Free if available. Your current package and price are displayed before activation.
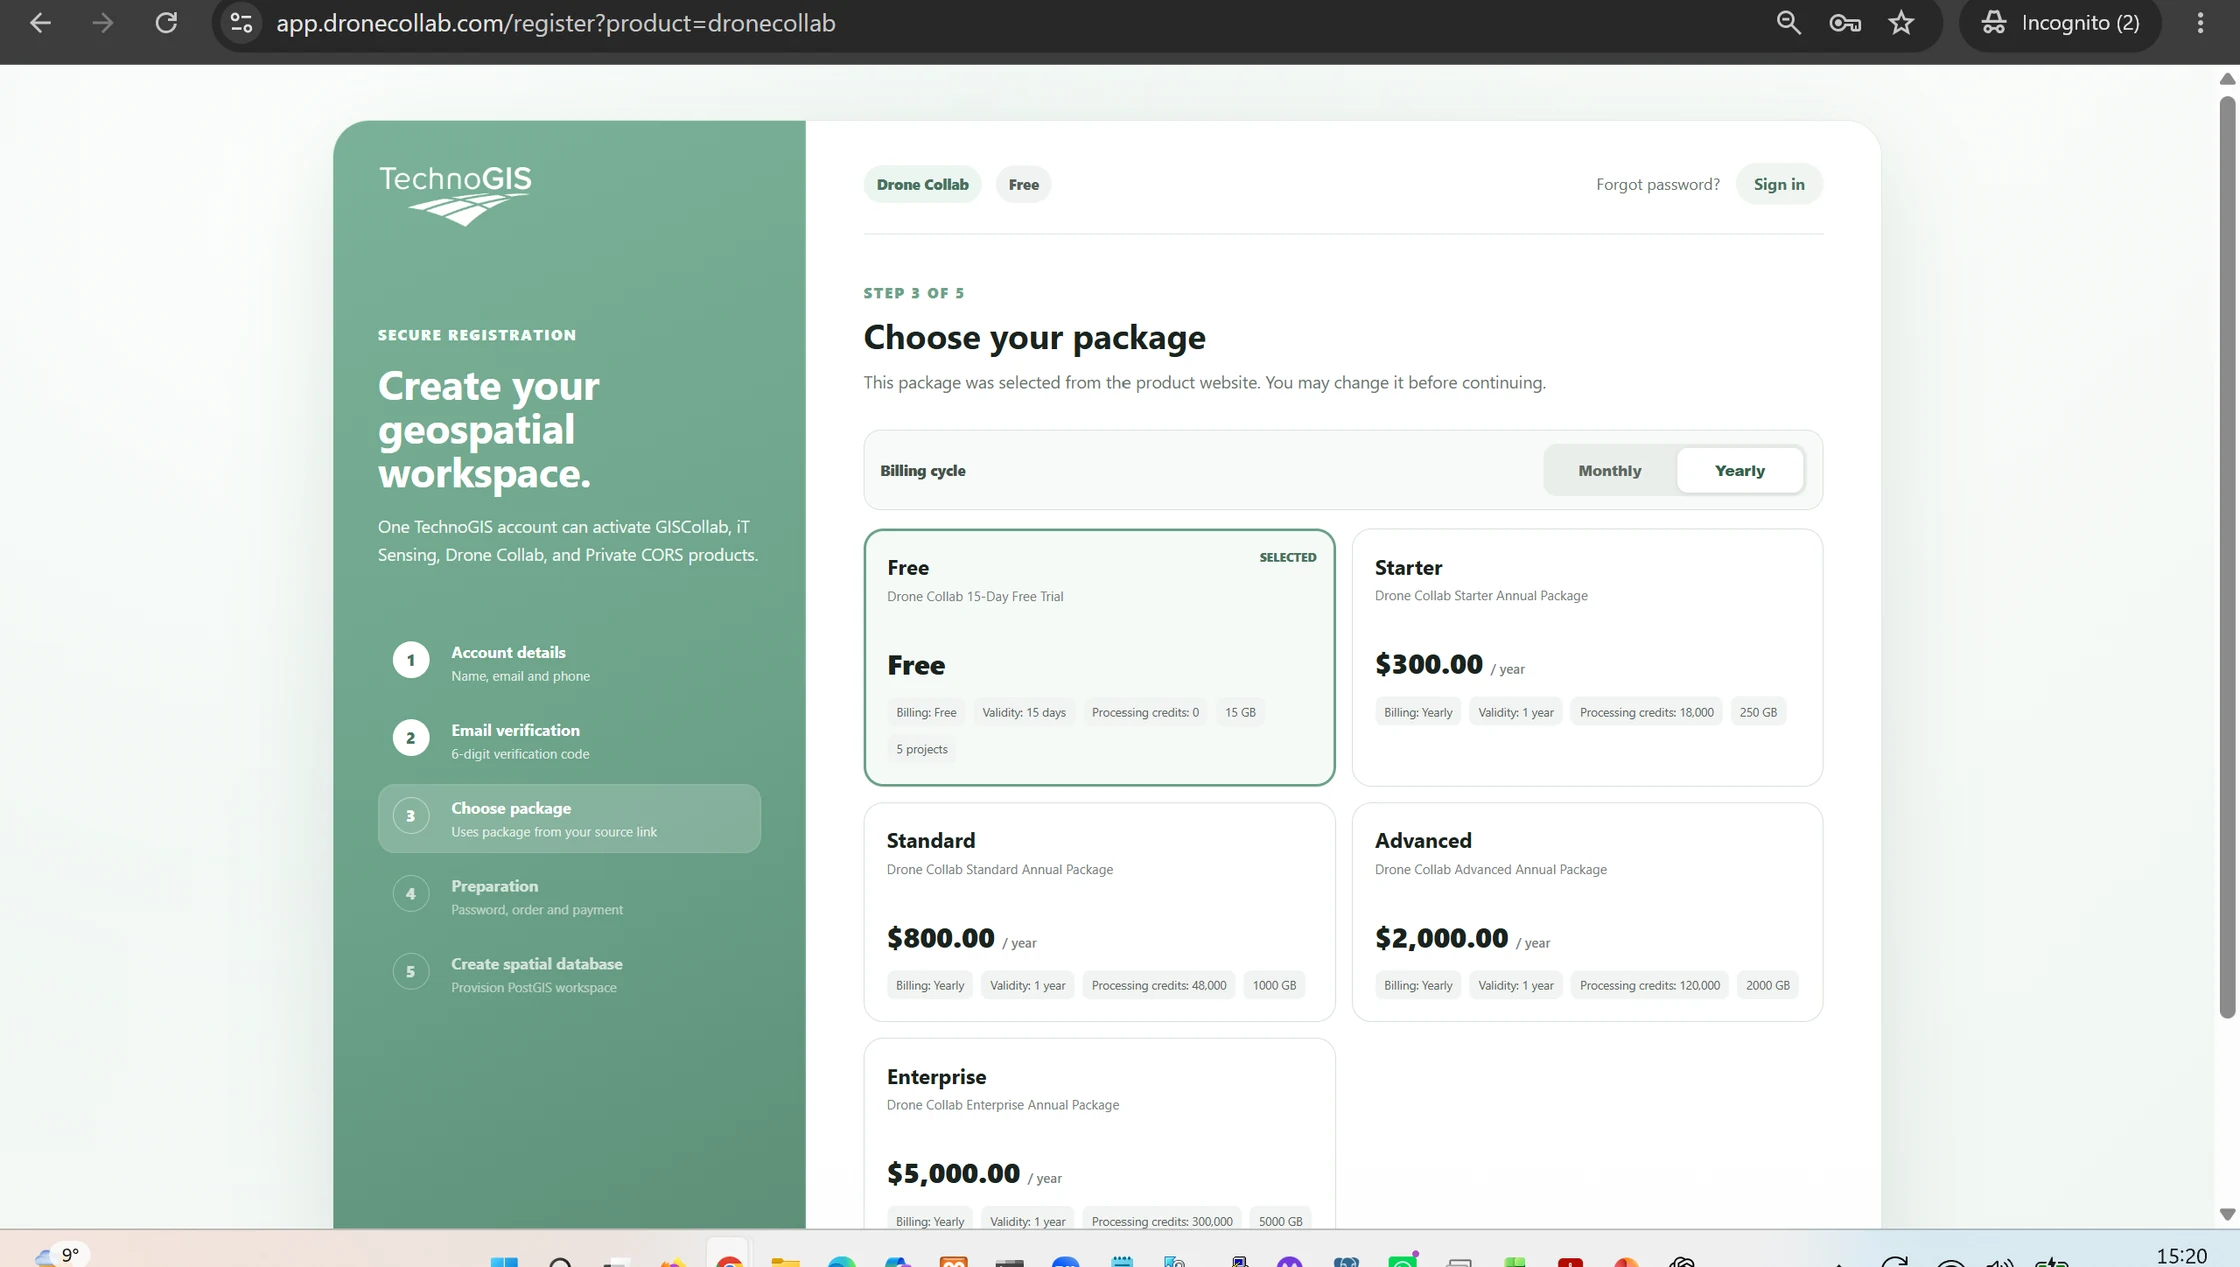
Screenshots illustrate the interface. Live package details and availability may change.
DroneCollab package selection during account registration
DroneCollab · Choose package
4
Preparation

Set your account password

Confirm the selected product, package and validity. Enter a password of at least eight characters and repeat it.

Click Prepare account to continue. Paid packages may require a payment step on the live website.
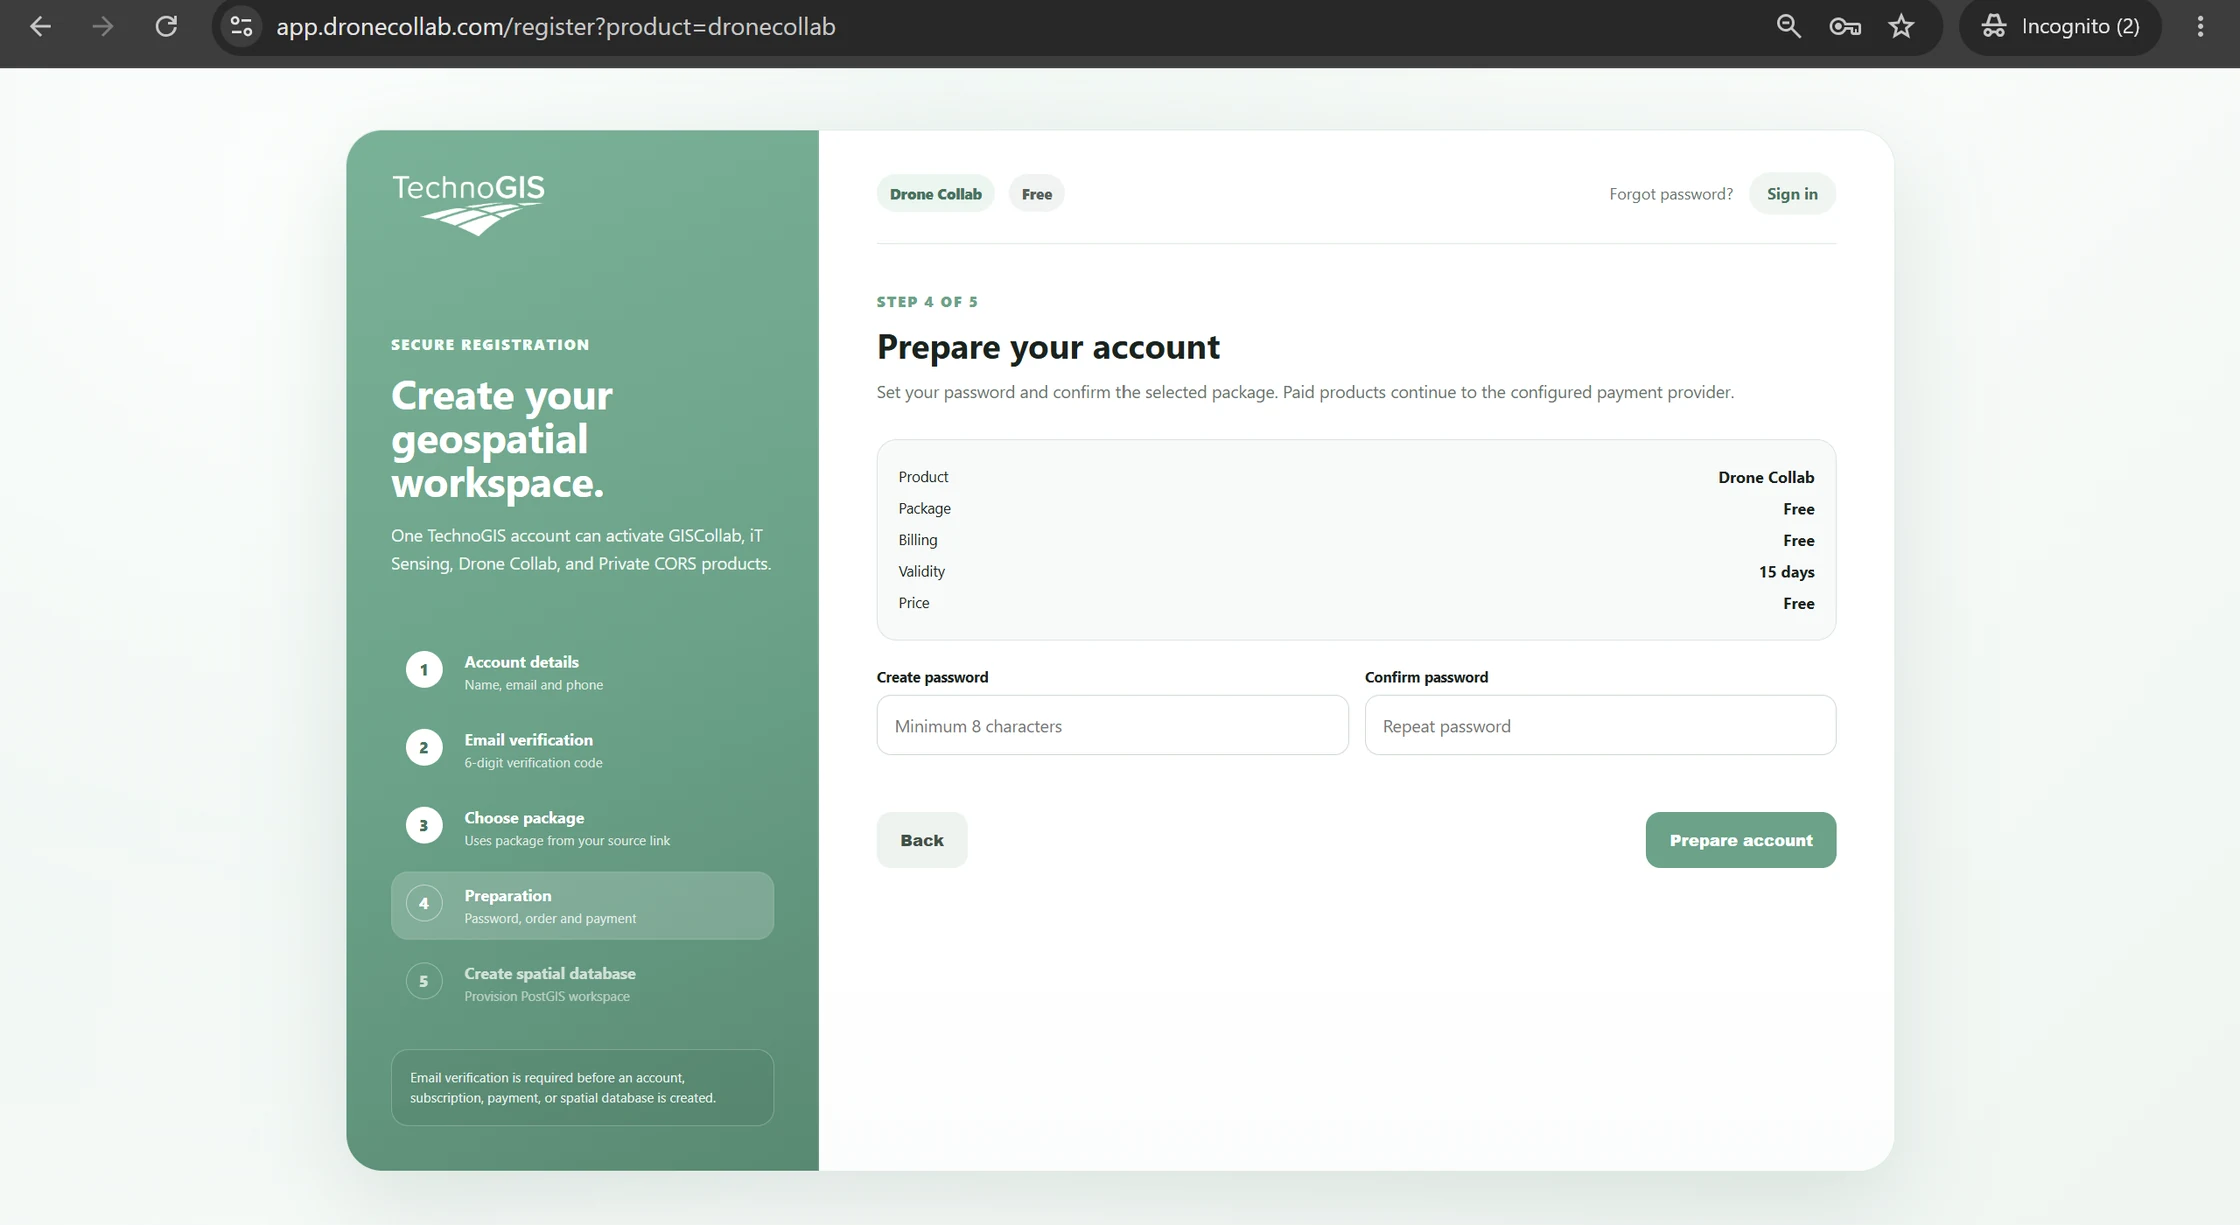
Preparation step before creating a DroneCollab workspace
DroneCollab · Preparation
5
Create spatial database

Wait for workspace preparation

DroneCollab activates the verified account and prepares the selected product and workspace.

Keep the page open until setup finishes, then click Continue to workspace.
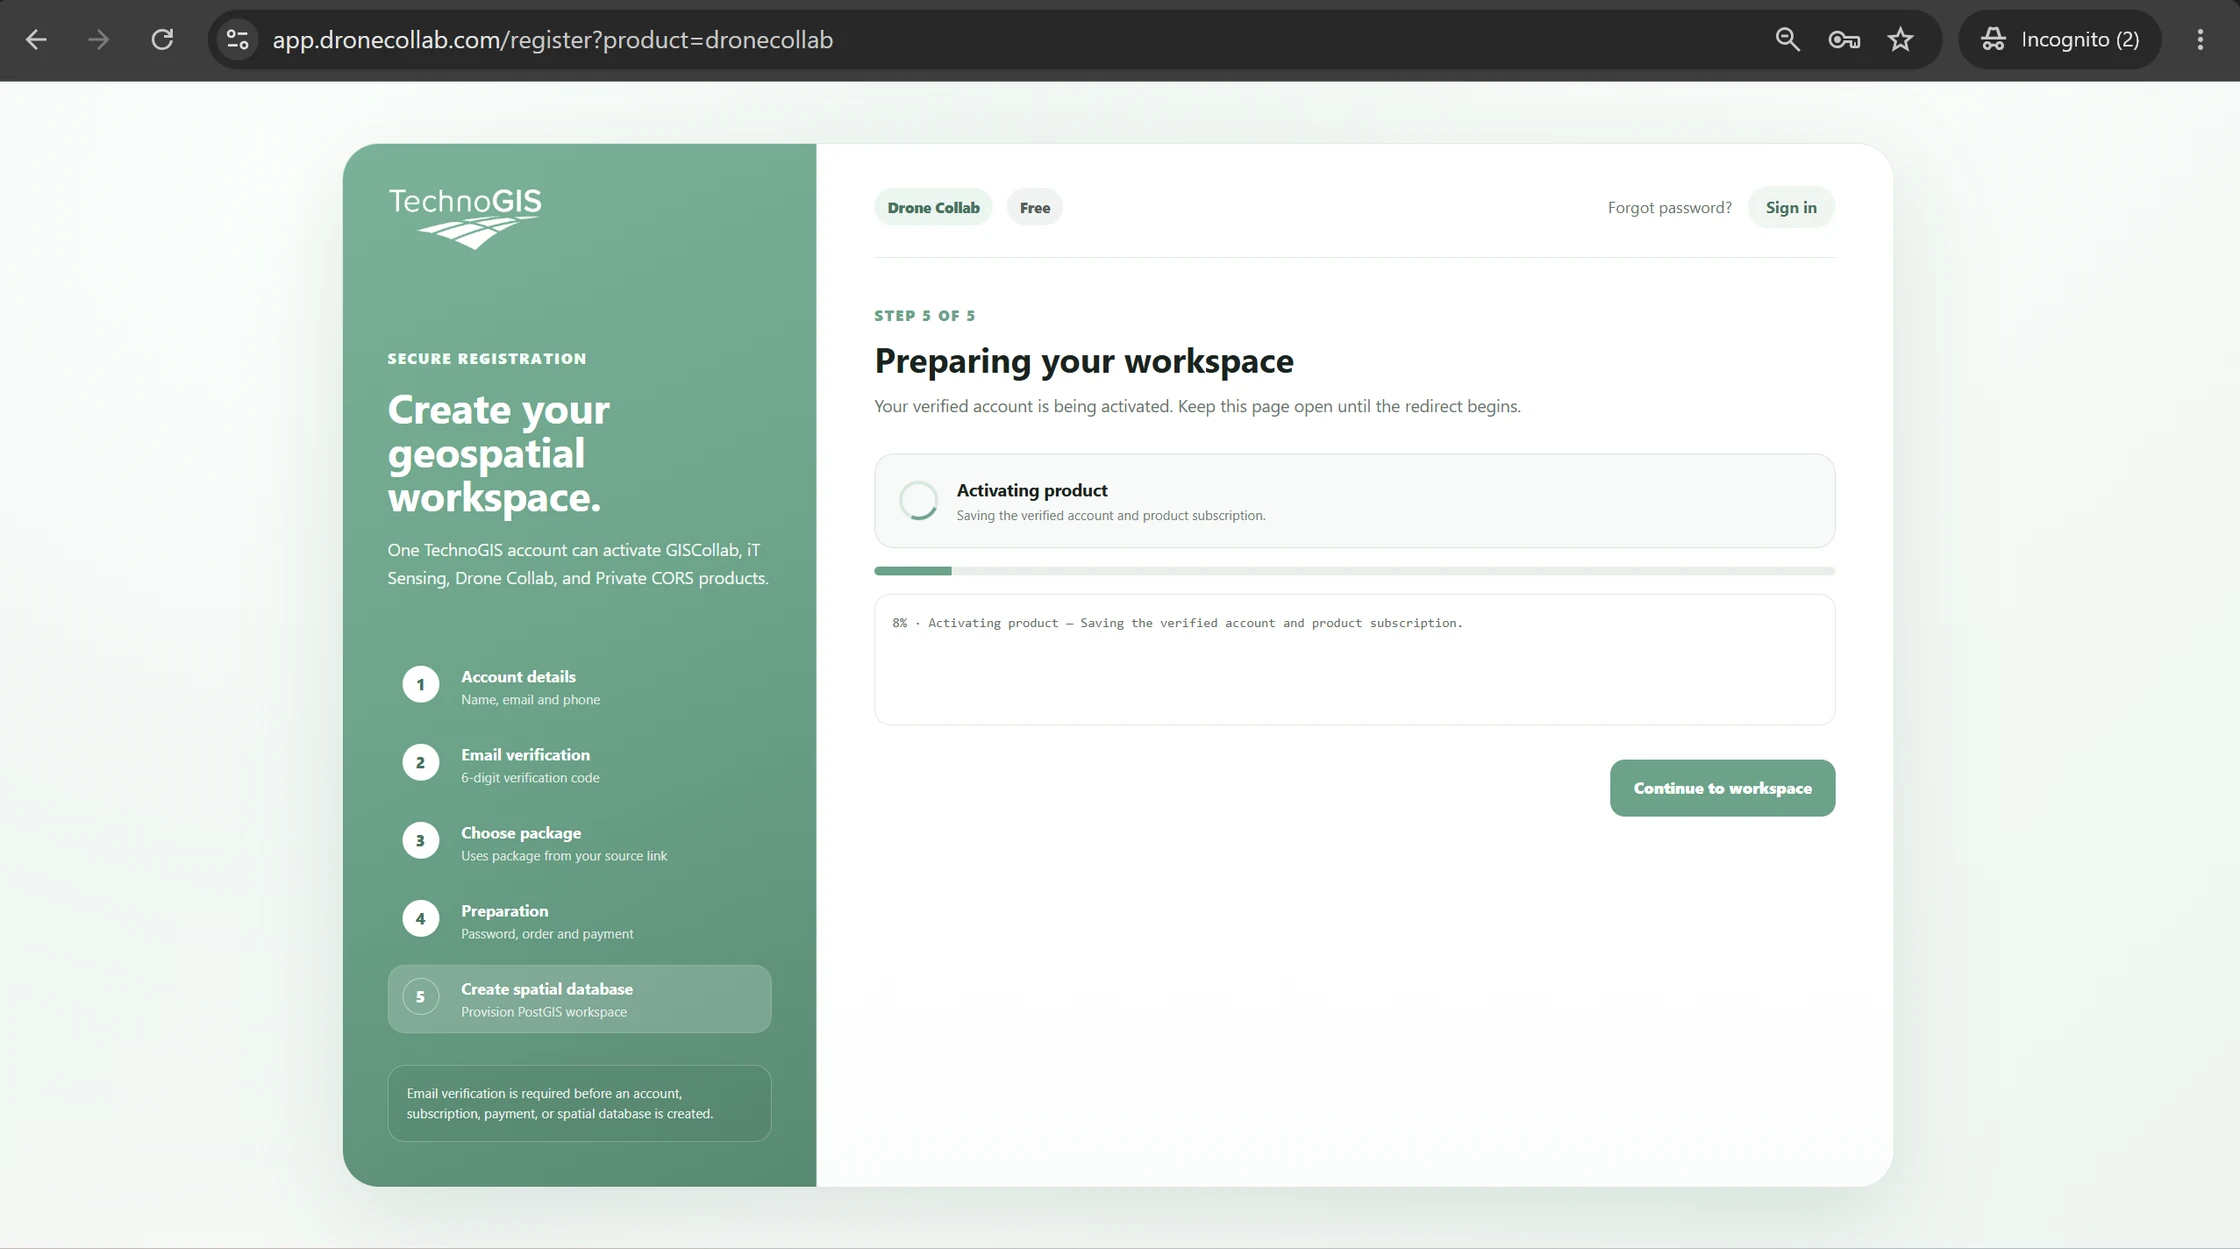
Creating the spatial database for a DroneCollab mapping workspace
DroneCollab · Create spatial database
6
Your workspace

Start your first drone project

The workspace opens with My First Project and a map. This is the start of your drone mapping workflow.

Use Upload Photos to add your UAV images, or Create Ortho to begin photogrammetry after uploading images.
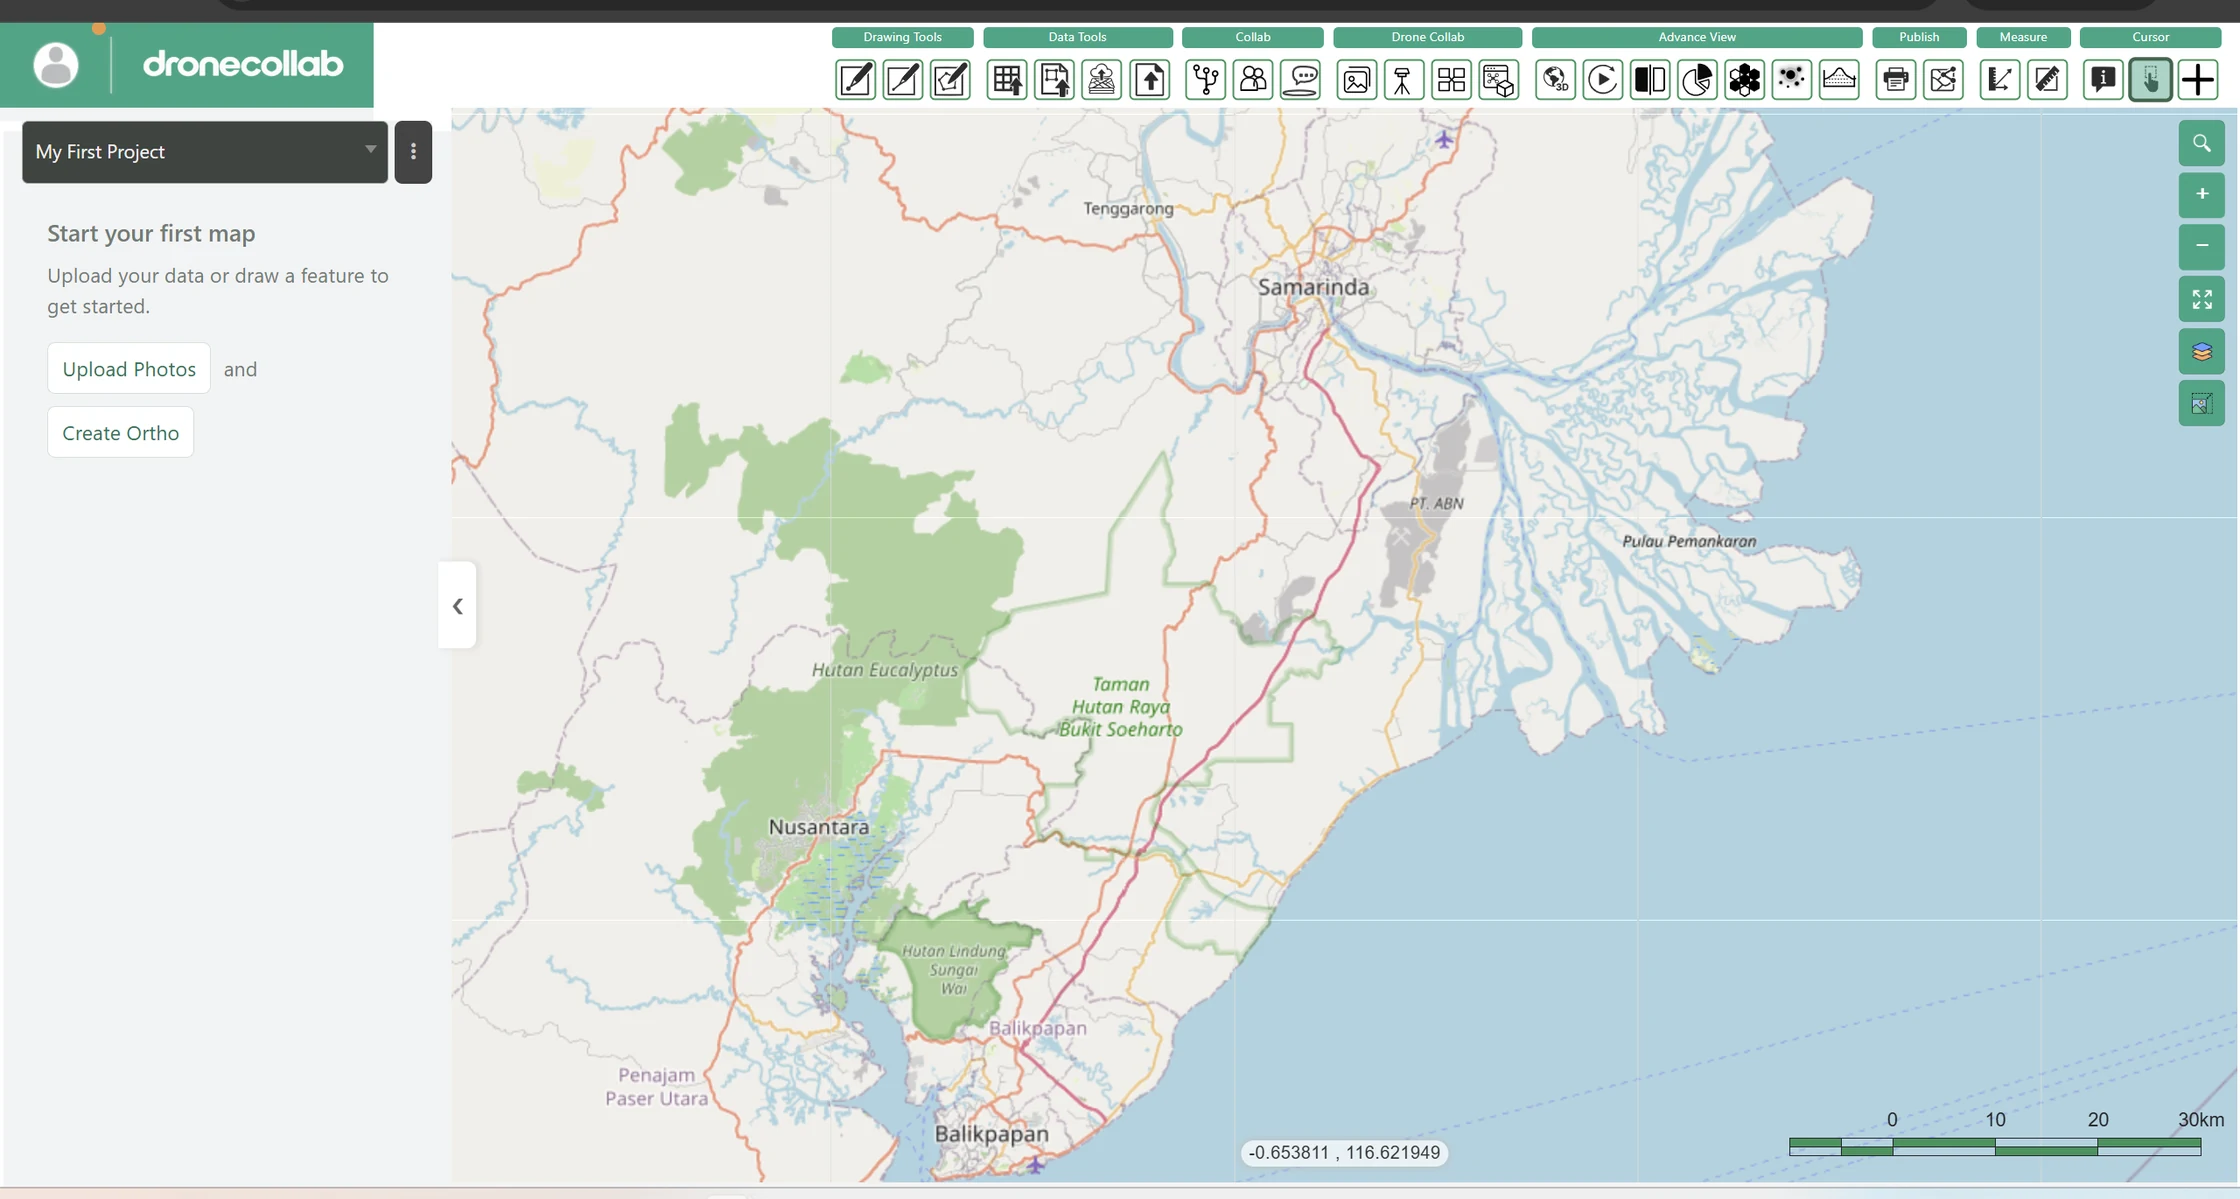
DroneCollab map workspace after account registration
DroneCollab · Your workspace

Your first workspace is ready

Screenshots illustrate the interface. Live package details and availability may change.

Create free account ↗